If you’re wondering how to delete screenshots on MacBook, you’re not alone. Most Mac users end up with a cluttered desktop full of screenshots that eat up space on their hard drive. Whether you’re cleaning up your MacBook or just trying to stay organized, deleting screenshots on MacBook is a quick fix. In this simple guide, we’ll walk you through how to find and delete screenshots on your Mac.
How to Find and Delete Screenshots Manually
Screenshots are saved automatically every time you press Command (⌘) + Shift + 3 or Command (⌘) + Shift + 4. By default, they go straight to your Desktop, which means they can pile up quickly and slow things down.
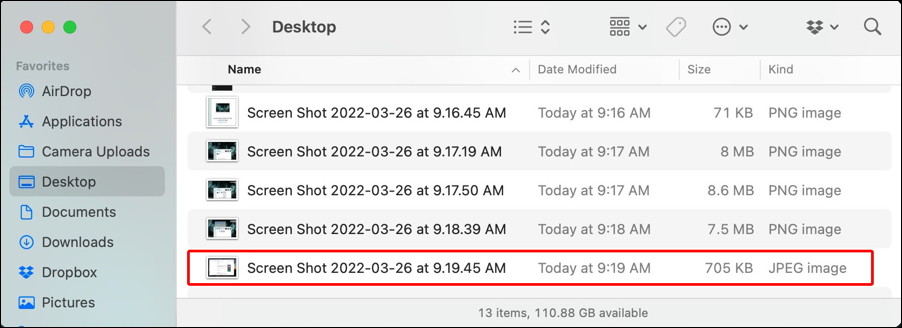
1. Check Your Desktop
Open your Desktop folder.
Look for files named something like Screenshot [date] at [time].png.
Select one or multiple files and press Delete or drag them to the Trash.
2. Use Finder to Search for All Screenshots
Open Finder.
In the search bar, type: kind:image
Click the “+“ button to add a filter: choose “Name” → “Contains” → type “Screenshot”.
This shows all screenshots saved on your Mac.
3. Select and Delete
Select all the screenshots you no longer need.
Right-click and choose “Move to Trash” (or just press Command (⌘) + Delete).
Don’t forget to empty your Trash to free up the space for good.
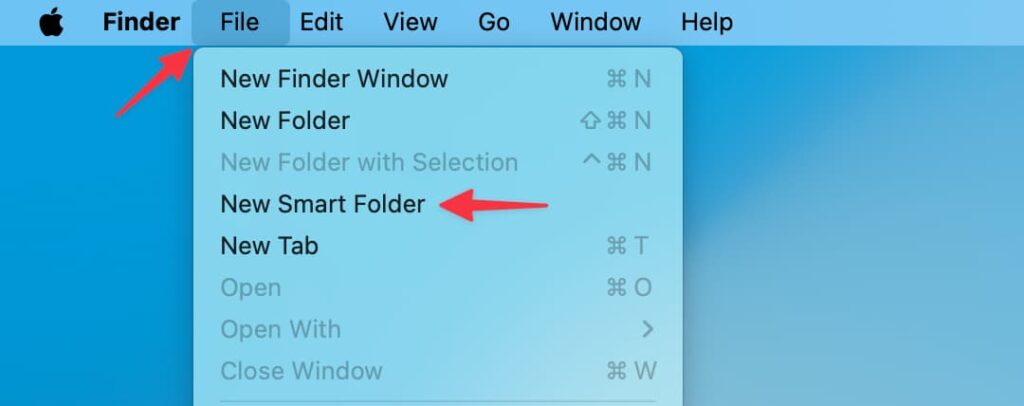
Automate Screenshot Cleanup with Smart Folders
Go to Finder > File > New Smart Folder.
Set the search criteria to automatically find screenshots.
Save the Smart Folder for quick future access.
Want a Cleaner MacBook?
If you regularly rent or use MacBooks for events, business conferences, or short-term projects, keeping them clean and clutter-free ensures everything goes smoothly.
At The Tekk Group, we provide fully optimized, ready-to-use MacBooks and tech devices for rent — complete with custom setups, pre-installed software, and 24/7 support.